Showing posts with label end bands. Show all posts

Friday, September 17, 2010

Leather Reback - PC4 Paper

This particular book originally had laced on boards. The board were now detached, but were important to keep. Since the original leather was delaminating from the boards, I decided to remove it and attach it to new boards. 
 
The first step was to clean and line the spine. Then I sewed on end bands, constructed end papers, and cut new boards. I attached the boards and put the book in a finishing press, where I molded a damp strip PC4 paper over the spine. This dried over night.
I was able to remove the original leather from the boards gently with a spatula. I also removed and kept the turn-ins. I glued down and turned in the new PC4 spine piece, infilled the boards, and glued down the original leather and turn-ins. Where sections of the turn-ins were missing, I glued down PC4 strips. I lined the board edges and missing areas with Japanese tissue. Then glued down the end papers, and toned the tissue to match. This was then end result.

Sunday, September 5, 2010

Leather Reback - Wooden Boards

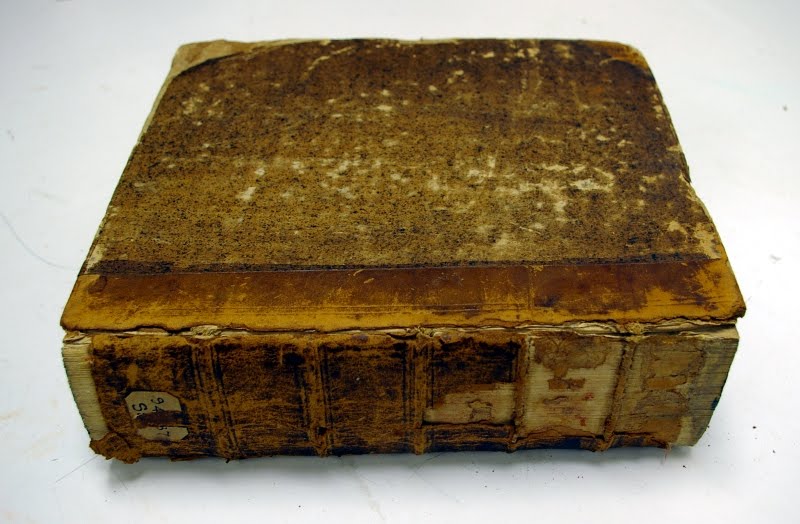
This was a book from the Ranke collection at Syracuse. The spine was deteriorating and the boards were detached. It was not a good candidate for rebinding because of the level of tooling on the boards. The boards were also wooden, which is not common, and therefore should be preserved. This was the original condition of the book.
I cleaned the spine with methyl cellulose and lined it with Japanese tissue and linen. I made some page repairs with heat set tissue, and resewed the end bands. I lifted the original leather at the spine and corners, attached new, and repaired missing areas or cracks with Japanese tissue. Finally, I toned the tissue to match and applied a coat of SC 6000. This is the end result.
Note: For this particular book, the SC 6000 was a mistake. It caused the tissue areas to shine more than the original leather surface, even after a coating of Klucel G. I would advise against the use of SC 6000 if the original material had lost sheen or if the repaired area is very large.

Monday, August 9, 2010

Ranke Rebind

I found this book in the Ranke collection, in Special Collections at Syracuse University. Both joints were broken and the boards loose. The leather was missing at the corners and what remained appeared to be only the flesh side. 
 
 
I soaked the front board in a warm water bath to float off the original book plates. While that soaked, I scraped the old leather off the spine with a cobbler's knife. I covered the spine with methyl cellulose to remove excess glue or linings. Then I lined the spine with Japanese tissue and linen, and added new end bands and end papers.
I cut new boards, and sanded them down to fit against the shoulder. I attached them to the text block with the linen lining. Then I cut a new piece of leather for the spine, and parred the edges. I attached this leather to the spine with paste, as a tight back. After gluing down the turn-ins, I constructed head caps and pressed the book overnight.
Once the new leather was set, I trimmed what overlapped onto the boards and then infilled the board with 10 pt. Next, I covered the board with paste paper, overlapping slightly on the leather. When the paste paper was dry, I trimmed the turn-ins and infilled the inside of the boards. Finally, I glued down the end papers and reattached the original book plates with paste. This was the end result.

Wednesday, June 23, 2010

German Springback

I have made one German style Springback before, and decided to make another, smaller one. Following these instructions, I made this.
 Note: Because my Springback was bound in leather, not only did I have to pare the edges, but I also had to pare the joint so the material would fit into the groove. I  was able to do this by first drawing a line where the grooves would be. Then, placing a brush handle under the line and running my paring knife along it. This removed a small amount of the leather, and gave me a guide to work from. I pared the rest thin using a scalpel.

Sunday, June 6, 2010

The Thread That Binds - Design Binding

For The Bone Folder's 2010 Bind-o-rama, the text block chosen was The Thread That Binds. I worked on this design in my book binding class. I decided to sew the text block on raised cords. The signatures were very thick, so I decorated the edge with speckled blue acrylic. The leather I had to work with was a thick, gray, morocco grain. For a color scheme, I decided to go with gray and blue. I sewed the text block with blue thread (so it would show on the exposed cords), and sewed blue and gray end bands. For the boards, I glued pieces of mat board together. This provided me with the thickness I needed to match the leather, and was easily shaped by sanding. (I had to angle the boards to be thinner at the spine, so that book could open easily). I attached these boards to the text block by fraying and pasting out the cord on them.
I pared the leather and cut away the middle with a circle cutter. I also attached this with paste, leaving extra material out at the turn in to construct the head/tail cap. Then I infilled the covers, glued down the paste papers and trimmed the turn ins. For the joint, I pared two strips of the same leather thin and pasted them down, overlapping slighting on the text block and on to the board. When those dried, I rubbed them down flush with a bone folder at the spine, then infilled the boards and cut sheets of gray Roma for the end papers. The board sheet was glued down directly on the covers. The fly sheet however, was glued onto the text block using just a thin bead of PVA along the spine and fore-edge. Finally, I painted the exposed area of the spine to match the paste paper.

Thursday, June 3, 2010

Leather Reback - Quarter Bound

This is another book from the Syracuse University Ranke Collection that was a good candidate for rebacking. The sewing was completely intact (on raised cords), but the leather at the spine and joint was delaminated.

I was able to remove most the leather from the spine dry, and applied a thin layer of methyl cellulose to remove the rest. Then, I pasted out the spine, and lined it with Japanese tissue. While that dried, I cut strips of linen to be glued down between the cords. Then, I resewed the end bands.
Using a scalpel, I cut along where the leather meets the paper on the boards. I removed the old leather, and lifted the paper slightly. I also lifted the endpapers at the corners and at the spine, for the turn ins. (I also put some brown Morike underneath the lifted paper for support. The paper was brittle and kept breaking. Adding the Morike enabled me to handle it without causing more damage). I measured and cut the new leather and prepared it by paring, dampening with a sponge, pasting it out, and allowing it to sit for the paste to soak in. Then I reattached the boards by gluing out the linen strips and bringing them on to the board. I trimmed the linen so it only overlapped by about half an inch. Then I cut two strips of 10 point board, the exact distance from the spine edge of the board to about 1mm before the paper. This makes the transition between the new and old materials smoother. After gluing down the 10 point strips, I attached the new leather to the corners, and put some silicon release paper between the board and text block. Then I attached the new spine leather, running a bone folder along the cords to accentuate them, and leaving enough material at the turn in to construct the head/tail caps. I wrapped a piece of cord around the joint, and put the book in a press to dry.

Tuesday, May 25, 2010

Leather Reback

On a recent field trip to the book conservation lab at Cornell University, I saw a few leather bound books that were rebacked with new leather (calf). This was interesting for me because most of the leather rebacks were do at Syracuse are repaired with PC4 paper. I decided to go through the stacks and find a good candidate for this treatment. This was the book I found.
My first step was to dye some of the calf leather we had to match. I used J.Hewitt aniline dyes, which start as a powder. You mix the powder with wheat starch paste (powder) and a little water to make a paste, then dilute as needed with boiling water. Dampen the leather with a sponge, then apply the dye. This picture shows the leather before (left) and after (right) dying.
While the leather was drying, I removed the old spine piece (saving the label), and cleaned the spine with methyl cellulose. I had to watch it carefully to the original end bands did not come off with the gunk. I pasted out the spine and lined it with Japanese tissue, which came up on to the end bands for additional support. Then I cut strips of linen, to fit between the cords, and glued them down with PVA. While the spine dried, I lifted the leather and end papers at the spine and corners of the boards. I reattached the boards by gluing the linen spine lining down under the lifted leather.
I pared and pasted out the new leather (one thick coat, let sit for 10 min folded over itself, add another coat) and molded it over the corners and spine. I also made sure to leave enough leather at the head and tail (after turn ins) to construct head and tail caps. I left this to dry over night. 
The next day, I glued down the lifted materials with PVA. I glued out a strip of Mylar, and slid it under the lifted leather, tapped down on it gently, and slid the strip out. This ensures just enough glue gets underneath, and has less risk of the leather darkening. I also pasted out strips of Japanese tissue for the inner hinge. 
While this dried, I worked on the spine label. I found a Morike similar in color to the label, and glued two pieces together. Then I glued the original label to the Morike and toned it to a better match with acrylics. I measured the spine width, and the height between cords, and cut the Morike to size. Then glued it in place with PVA. These are pictures of the end result.
I am going to try the technique on other books in the lab. The biggest problem I faced was building up my corners, which is something I need to work on. Other than that, my color is a little light, so the next time I will add a few additional coats of dye and dab them on with a sponge, to give the leather an aged look. Aside form dying the leather, this process didn't take much longer than a PC4 reback, and I like the end result better. Obviously the materials for this type of repair are more expensive, but I think it is worth it for the right books.

Monday, December 28, 2009

Rebacking Full Leather Bindings

Rebacking is a treatment typically performed when the text block has broken at the joint in the following three ways: where the endpapers fold, where the boards are connected to the text block (linen or mull spine liner in cloth bindings and the cords that lace on boards in leather bindings), and the cover material. Rebacking consists of constructing a new spine piece out of durable/flexible paper, and using it to reattach the text block and boards so the book can function properly.
To illustrate the process with full leather bindings, I selected four dictionaries from the collection at Syracuse which needed rebacking. All front covers were detached from the text block, and about half of the back covers. Spines had split away from the covers and had several bits missing and all the endbands cracked and coming away from the text block. The following images depict this condition.
 
The first step is to clean and reline the spines. I removed the old covers, spines and broken endbands. Using silicon release paper lined boards, I cleaned each spine with methyl cellulose, being mindful of the raised cords. When the spine was clean, I lined the entire spine with Japanese tissue. Since it is necessary for the cords to remain uncovered, I wanted to practice with two main methods of attaching the linen lining. For two books, I cut the linen into strips the exact distance between the cords, and lined each section between cords and at the head/tail. This took much longer, but laid flatter. For the other, I cut one long strip of linen, and then cut out spaces for each cord, which was faster, but bunched and wrinkled by the shoulder. Once the linen was attached I began resewing the endbands. Due to the large size of these books (approximately 18" tall), I had to move from the bench to the board shear to get the right height for sewing.
When the endbands were completed I began preparing the spine pieces. For leather bindings, PC4 paper is used. It is a heavyweight paper, which is toned with methyl cellulose and acrylics. PC4 paper is relatively flexible when damp, but dries rather hard, functioning as the spine and the stiffener. The PC4 paper is cut into strips the length and width of the spine, accounting for turn-ins, and is parred at the edges. In order to fit tightly over the cords, the prepared spine piece must be molded. This is done using a finishing press (with screws along the sides) and cords. The PC4 paper must be dampened and placed in position. When this is done cords are wrapped around the raised cords of the spine, and secured at the screws like so:
While the spine pieces were drying, I worked on lifted the endpapers and leather on the covers. I then began re-attaching the boards to the text blocks via the linen. First I placed a sheet of waste paper and silicon release paper under the linen. Next, I glued out the linen (PVA) and removed the waste sheet. Then I  placed the covers on so the linen would stick to the board where the endpaper was lifted away, and kept the book closed to dry. Once it was dry, I began attaching the PC4 spines.
I began by putting the spine piece in position. I work with the book flat on the bench so the spine piece is weighted down by the text block. I glued out the board underneath the lifted leather (PVA) and continuously pressed down the PC4 paper until it stuck. Then I placed silicon release paper between the PC4 paper and the lifted leather (to prevent moisture from being introduced to the leather too soon), and flipped the book over to dry under the weight of the text block. I did this to all four books, then repeated the process with the other side. Then I glued down the lifted leather (PVA). Once all the spine pieces were attached to both covers, I glued down the head and tail turn-ins. When those had dried, I glued down the lifted endpapers (PVA), and then covered the hinge with a strip of Japanese tissue (paste).
After all the inside hinge repairs were done, I glued the remaining original spine pieces to the new PC4 spine (PVA) and consolidated the leather with Klucel G. Next I repaired the corners and put Japanese paper along the leather at the joint and along the edges of the original spine pieces. I used two different methods for this as well. On two books I used morike (top), which had to be cut to shape with a water pen, but was already a similar color and therefore easier to tone. On the other two I used dry tear strips (bottom), which allowed for fast and easy application, but proved more difficult to tone. Finally, I rubbed some SC 6000 over the joints to add some shine to the toned Japanese tissue and prevent the acrylic from cracking with use (Winter 2009).