Showing posts with label areoplane linen. Show all posts

Thursday, June 3, 2010

Leather Reback - Quarter Bound

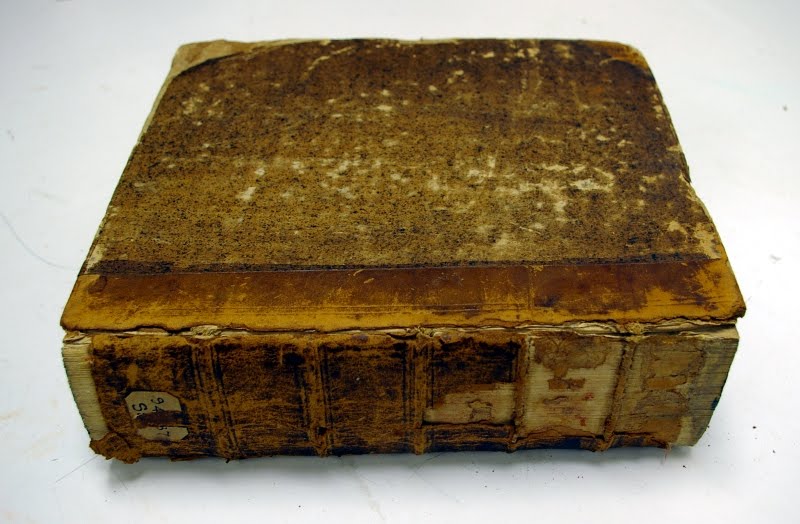
This is another book from the Syracuse University Ranke Collection that was a good candidate for rebacking. The sewing was completely intact (on raised cords), but the leather at the spine and joint was delaminated.

I was able to remove most the leather from the spine dry, and applied a thin layer of methyl cellulose to remove the rest. Then, I pasted out the spine, and lined it with Japanese tissue. While that dried, I cut strips of linen to be glued down between the cords. Then, I resewed the end bands.
Using a scalpel, I cut along where the leather meets the paper on the boards. I removed the old leather, and lifted the paper slightly. I also lifted the endpapers at the corners and at the spine, for the turn ins. (I also put some brown Morike underneath the lifted paper for support. The paper was brittle and kept breaking. Adding the Morike enabled me to handle it without causing more damage). I measured and cut the new leather and prepared it by paring, dampening with a sponge, pasting it out, and allowing it to sit for the paste to soak in. Then I reattached the boards by gluing out the linen strips and bringing them on to the board. I trimmed the linen so it only overlapped by about half an inch. Then I cut two strips of 10 point board, the exact distance from the spine edge of the board to about 1mm before the paper. This makes the transition between the new and old materials smoother. After gluing down the 10 point strips, I attached the new leather to the corners, and put some silicon release paper between the board and text block. Then I attached the new spine leather, running a bone folder along the cords to accentuate them, and leaving enough material at the turn in to construct the head/tail caps. I wrapped a piece of cord around the joint, and put the book in a press to dry.

Tuesday, May 25, 2010

Leather Reback

On a recent field trip to the book conservation lab at Cornell University, I saw a few leather bound books that were rebacked with new leather (calf). This was interesting for me because most of the leather rebacks were do at Syracuse are repaired with PC4 paper. I decided to go through the stacks and find a good candidate for this treatment. This was the book I found.
My first step was to dye some of the calf leather we had to match. I used J.Hewitt aniline dyes, which start as a powder. You mix the powder with wheat starch paste (powder) and a little water to make a paste, then dilute as needed with boiling water. Dampen the leather with a sponge, then apply the dye. This picture shows the leather before (left) and after (right) dying.
While the leather was drying, I removed the old spine piece (saving the label), and cleaned the spine with methyl cellulose. I had to watch it carefully to the original end bands did not come off with the gunk. I pasted out the spine and lined it with Japanese tissue, which came up on to the end bands for additional support. Then I cut strips of linen, to fit between the cords, and glued them down with PVA. While the spine dried, I lifted the leather and end papers at the spine and corners of the boards. I reattached the boards by gluing the linen spine lining down under the lifted leather.
I pared and pasted out the new leather (one thick coat, let sit for 10 min folded over itself, add another coat) and molded it over the corners and spine. I also made sure to leave enough leather at the head and tail (after turn ins) to construct head and tail caps. I left this to dry over night. 
The next day, I glued down the lifted materials with PVA. I glued out a strip of Mylar, and slid it under the lifted leather, tapped down on it gently, and slid the strip out. This ensures just enough glue gets underneath, and has less risk of the leather darkening. I also pasted out strips of Japanese tissue for the inner hinge. 
While this dried, I worked on the spine label. I found a Morike similar in color to the label, and glued two pieces together. Then I glued the original label to the Morike and toned it to a better match with acrylics. I measured the spine width, and the height between cords, and cut the Morike to size. Then glued it in place with PVA. These are pictures of the end result.
I am going to try the technique on other books in the lab. The biggest problem I faced was building up my corners, which is something I need to work on. Other than that, my color is a little light, so the next time I will add a few additional coats of dye and dab them on with a sponge, to give the leather an aged look. Aside form dying the leather, this process didn't take much longer than a PC4 reback, and I like the end result better. Obviously the materials for this type of repair are more expensive, but I think it is worth it for the right books.

Sunday, January 17, 2010

Rebacking Experiment

Rebacking cloth bindings is a relatively common repair, with several variations in treatment technique. For this reason, I decided to experiment with two different methods by experts in the field. Using instructional manuals, I completed two cloth rebacks in the style of Don Etherington and Dominic Riley.
To begin I choose a set of two books from the stacks, which were identical in size, thickness, and required the same level of treatment.
The first step in each method was the same. I separated the text block from the case, cleaned and lined the spine with Japanese tissue (paste), and trimmed the boards (just a hair) at the joint edge. Next, I attached the head and tail bands to both books and lined the spine with linen (PVA), using aeroplane linen on the Etherington volume because it is what he advocates. With the linen lining providing extra stability, I repaired broken sewing in both volumes. At this point, both methods advise attaching a spine lining of "thickish" paper, the exact height of the text block. I used 10 pt board (PVA), dampening the strip for the Etherington volume as advised.
The next step in Riley's manual is to repair the corners, using wheat starch paste, and dry them under pressure from a bull dog clip (I used clothes pins). I typically use PVA for corner repairs, so I treated the Riley covers as directed and left the Etherington (to be treated with PVA) for comparison. Then I lifted the cloth and endpapers on both books. As advised in the manual, for the Etherington volume, I removed excess board fibers by lining the lifted area with masking tape, pressing down, and pulling it off. This does remove a good amount of unnecessary board.
With the text block and covers prepped, I began constructing the new spine pieces. This was really the biggest difference between the two. Riley suggests using toned cloth, sized with methyl cellulose. For this is used linen, and toned with an acrylic/cellulose mix. Then I attached a spine stiffener of 10 pt board. Etherington prefers to use Japanese tissue. He suggests using morike of a similar color, lined with linen, and coated with Klucel G. I had to tone the morike available slightly, so I used an acrylic/Klucel mix. For this spine stiffener, I used blotting paper, because Etherington claims it is easier to shape (which proved true). I parred the edges on both spine pieces to reduce bumps under the cover cloth.
When the spine pieces were ready, I cased in each volume. Both advocate attaching the new spine piece first. Riley's detailed instructions were very helpful for this part. He suggests positioning the boards and then moving the book to a press, sticking out enough to have room to freely move the lifted cloth (The ploy-press was very handy for this part). Next, I glued out the cloth (making sure no adhesive got on the spine stiffener) and positioned it on the text block, with the stiffener was in the correct position. With the spine piece in place, I removed the book from the press, and glued down the turn-ins. Then I attached the case by drawing the linen over the joint, with the cover raised by boards and weights keeping the book in position (as seen below in my Reattaching a Text Block entry).
Etherington suggests casing-in a similar way, except he attaches the Japanese tissue to one cover first. Next he attaches the spine stiffener in the necessary position and trims the second edge of the Japanese tissue spine piece to fit in position on the second cover. I opted to attached the spine stiffener first and trim the morike to size, so the spine piece could be parred.
The finishing steps for both volumes are gluing down the endpapers and cloth, reattaching remaining original spine pieces, and toning with acrylic. This is the completed set (vol. I - Etherington, vol. II - Riley):
My reason for this experiment was to learn variations of cloth reback repairs, and develop a personal preference. I really liked Riley's method, and have used it since. I was taught to attach the text block to the covers first, then add the spine piece. I feel working on the case first is faster, and I like the end result better. However, I do prefer to use morike lined with linen for the spine piece, because it is easier to work with and to tone.
I was also interested in the difference between the paste (Left) and PVA (Right) corners. The corners repaired with paste and held with clothes pins dried perfectly flat, while the PVA corners remained slightly curved. The only problem is the paste took a long time to dry. I think whether this additional time is worth while will depend on the book (2010).
Manuals used:
Repairing an Original Cloth Case Binding - Don Etherington
The Art and Science of Cloth Rebacking: Some Useful Techniques Shared - Dominic Riley