Showing posts with label methyl cellulose. Show all posts

Sunday, September 5, 2010

Leather Reback - Wooden Boards

This was a book from the Ranke collection at Syracuse. The spine was deteriorating and the boards were detached. It was not a good candidate for rebinding because of the level of tooling on the boards. The boards were also wooden, which is not common, and therefore should be preserved. This was the original condition of the book.
I cleaned the spine with methyl cellulose and lined it with Japanese tissue and linen. I made some page repairs with heat set tissue, and resewed the end bands. I lifted the original leather at the spine and corners, attached new, and repaired missing areas or cracks with Japanese tissue. Finally, I toned the tissue to match and applied a coat of SC 6000. This is the end result.
Note: For this particular book, the SC 6000 was a mistake. It caused the tissue areas to shine more than the original leather surface, even after a coating of Klucel G. I would advise against the use of SC 6000 if the original material had lost sheen or if the repaired area is very large.

Monday, August 9, 2010

Ranke Rebind

I found this book in the Ranke collection, in Special Collections at Syracuse University. Both joints were broken and the boards loose. The leather was missing at the corners and what remained appeared to be only the flesh side. 
 
 
I soaked the front board in a warm water bath to float off the original book plates. While that soaked, I scraped the old leather off the spine with a cobbler's knife. I covered the spine with methyl cellulose to remove excess glue or linings. Then I lined the spine with Japanese tissue and linen, and added new end bands and end papers.
I cut new boards, and sanded them down to fit against the shoulder. I attached them to the text block with the linen lining. Then I cut a new piece of leather for the spine, and parred the edges. I attached this leather to the spine with paste, as a tight back. After gluing down the turn-ins, I constructed head caps and pressed the book overnight.
Once the new leather was set, I trimmed what overlapped onto the boards and then infilled the board with 10 pt. Next, I covered the board with paste paper, overlapping slightly on the leather. When the paste paper was dry, I trimmed the turn-ins and infilled the inside of the boards. Finally, I glued down the end papers and reattached the original book plates with paste. This was the end result.

Friday, July 23, 2010

Missing Board

This particular book was leather bound and missing its back board.
Normally, my first response would be to rebind the book. If the book had any important book plates, I would soak that board in a warm water bath, until the book plates floated off. Then I would reattach them to the new board when dry. However, this book had a nice book plate that was painted with fugitive inks. A water bath would have destroyed it. I  had to find another way to replace the board.
Since the front board was not attached, I used it as a guide to cut a new piece of board (make sure to account for the added thickness of materials at the squares). I sanded and back cornered the new board so it would tight against the shoulder. Then I cut new endpapers for the back cover, and attached them to the text block with paste.
I toned a piece of PC4 paper using and acrylics/methyl cellulose mix, to match the original leather. While that dried, I built up the corners on the remaining board.
I took the new board and covered it with the PC4 paper and put it in the press, between blotters, to dry flat. Since this paper is relatively thick, I also infilled the board with a 10 pt card (after pressing).
Because the original spine was a tight back and was still intact, I couldn't bring the new material around the spine. Therefore, I attached the new board as I would the originals, with Japanese tissue at the hinge and joint.
I attached the boards at the inner hinge first, using a strip of Japanese tissue and wheat starch paste. (This has to be done one at a time. Make sure the paste has ample time to dry). I reinforced this by adding additional tissue to the joint with PVA. I also reconstructed the head caps. I glued out a piece of tissue, overlapping on to both boards, and wrapped it around a piece of cord, the width of the spine and the height of the squares.
Finally, I toned all the tissue to match. This is the end result. (Middle: original leather board, Bottom: new PC4 board).

Thursday, June 10, 2010

Recent Rebacks

These are two cloth rebacks I completed simultaneously. Thankfully for both books the sewing was in tact. This first book's covers were detached, the end papers were delaminating, the spine round was askew, and the first three pages were loose.
I started by tipping in the loose pages with wheat starch paste. Then I pasted out and lined the spine, with Japanese tissue and linen. When both linings were dry, I gently hammered the spine to fix the round. Then I proceeded with a reback repair as usual. This is the end result.
This is the second book.

Tuesday, May 25, 2010

Leather Reback

On a recent field trip to the book conservation lab at Cornell University, I saw a few leather bound books that were rebacked with new leather (calf). This was interesting for me because most of the leather rebacks were do at Syracuse are repaired with PC4 paper. I decided to go through the stacks and find a good candidate for this treatment. This was the book I found.
My first step was to dye some of the calf leather we had to match. I used J.Hewitt aniline dyes, which start as a powder. You mix the powder with wheat starch paste (powder) and a little water to make a paste, then dilute as needed with boiling water. Dampen the leather with a sponge, then apply the dye. This picture shows the leather before (left) and after (right) dying.
While the leather was drying, I removed the old spine piece (saving the label), and cleaned the spine with methyl cellulose. I had to watch it carefully to the original end bands did not come off with the gunk. I pasted out the spine and lined it with Japanese tissue, which came up on to the end bands for additional support. Then I cut strips of linen, to fit between the cords, and glued them down with PVA. While the spine dried, I lifted the leather and end papers at the spine and corners of the boards. I reattached the boards by gluing the linen spine lining down under the lifted leather.
I pared and pasted out the new leather (one thick coat, let sit for 10 min folded over itself, add another coat) and molded it over the corners and spine. I also made sure to leave enough leather at the head and tail (after turn ins) to construct head and tail caps. I left this to dry over night. 
The next day, I glued down the lifted materials with PVA. I glued out a strip of Mylar, and slid it under the lifted leather, tapped down on it gently, and slid the strip out. This ensures just enough glue gets underneath, and has less risk of the leather darkening. I also pasted out strips of Japanese tissue for the inner hinge. 
While this dried, I worked on the spine label. I found a Morike similar in color to the label, and glued two pieces together. Then I glued the original label to the Morike and toned it to a better match with acrylics. I measured the spine width, and the height between cords, and cut the Morike to size. Then glued it in place with PVA. These are pictures of the end result.
I am going to try the technique on other books in the lab. The biggest problem I faced was building up my corners, which is something I need to work on. Other than that, my color is a little light, so the next time I will add a few additional coats of dye and dab them on with a sponge, to give the leather an aged look. Aside form dying the leather, this process didn't take much longer than a PC4 reback, and I like the end result better. Obviously the materials for this type of repair are more expensive, but I think it is worth it for the right books.

Wednesday, May 12, 2010

Tape Removal - Music Book

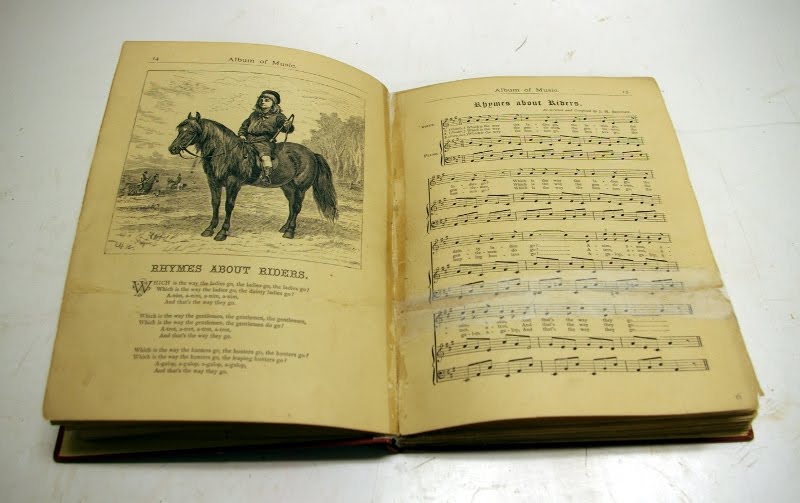
This book's sewing had broken in several places and the signatures were being held together with pressure sensitive tape. The case was detached, but in good shape.
I began by removing all the tape with a tacking iron and spatula. In several areas, the plastic carrier from the tape had dried and fallen off, leaving behind only the adhesive residue. I was able to remove most of this using ethyl alcohol and a cotton swab. When I had all the signatures loose, I washed the book between Reemay. First, in more alcohol to help reduce the tape staining and open the fibers. Then in water twice and Magnesium Bicarbonate [Mg2(CO3)2]. These pictures show the water washes one (top) and two (bottom). As you can see, a lot was removed.
When the sheets were dry, I guarded the loose leaves back together and repaired damaged pages with Japanese tissue and heat set tissue. Then I resewed the text block (two on) and lined the spine with Japanese tissue and linen. I repaired the case by lining Japanese tissue behind the original spine and adding a blotting paper stiffener. I also put PVA in the bumped corners and more Japanese tissue on the corners and endcaps, where the cloth was damaged. I rehung the boards using the linen spine lining, then covered the hinge with a strip of Japanese tissue. These are pictures of the end result.

Wednesday, May 5, 2010

Leather Reback with Previous Repair

I picked this book off the cart because it had a lot of previous repairs. The sewing had broken and the text block was in two pieces. The sections closest to the break were being held in place with pressure sensitive tape. Being a tight backed book, the spine had also broken. The book was being held together by what looked like maroon duct tape. This tape was also on a few pages in the first section. There was also approximately ten pages of images, which had be cut down and taped together, in a random order, with pressure sensitive tape behind the title page.
I began be removing the tape from the spine. The adhesive was delaminating, so it peeled off easily, but did leave some residue on the leather. Next I removed the pressure sensitive tape from the pages of the text block with a tacking iron. I repositioned the now loose folios, cleaned the spine, and lined it with Japanese tissue and linen. Then I repaired the sewing at the break.
I worked on the images while my spine liners were drying. I removed the tape from all the images and lined the sheets with heat set tissue. The images were on single sheets, which I collated and guarded together. Then I tipped them on to the front of the text block with a thin strip of Japanese tissue.
Then I lifted the leather on the cover and attached the text block via the linen. I constructed a new spine piece from linen lined Morike and added a 10 pt board stiffener. I attached this under the leather, the glued the leather back down. Finally, I put some PVA and Japanese tissue on the corners to reshape them, and covered the linen hinge with a strip of Japanese tissue (paste).

This book was an experiment in toning techniques for leather. I toned the new spine piece prior to attaching, and I tried to stipple a variety of hues to better match the leather. My colors were a little light for this book, but overall I was pleased with how it looked. I plan on trying this technique again on other books.

Thursday, April 29, 2010

Recent Projects

These are two books I have treated recently in the lab. Unfortunately, I got ahead of myself with these books and did not take before images.
This book was a half leather reback. The text block was a group of pamphlets sewn together and one section was exceptionally brittle. Initially, I tried to tip in the loose pages of this section with paste, but it was unsuccessful. It had to be removed from the group, washed and deacidified,  then guarded and resewn into the text block.
After the text block was repaired, I repaired the case and reattached it as seen in my previous entries. This is the completed book.
This book originally had fake raised bands, so I decided to mimic that when I rebacked it. Before cleaning and lining the spine, I made a template of the band positions. To make the fake raised bands, I glued two pieces of leather together and cut them into strips of the appropriate size. Then, using the template, I positioned the strips on the new spine stiffener. This was good practice, but because the leather was rotting 19th century leather, nothing was gained by saving the spine pieces. This process should be reserved for either better quality leather or a more valuable book. This was the end result.

Friday, April 23, 2010

Cook Book

A good friend of mine inherited this cook book from her aunt, in this condition. It is a little dated with some of the recipes, but she claims it also contains priceless ones. Looking for a new project to tackle, I offered to repair it for her. The covers were totally detached, the endpapers were falling off the boards, and the first section and the last two pages were in pieces. (The middle image shows the first section's pages and the bottom is the last page of the index. This is also the page missing the most information).
I began by flattening and repairing the damaged pages. I lined them with heat set tissue, and added additional tissue to the fraying edges. The first pages of the first sections were missing, so when the pages I had were repaired, I guarded them to pages of Dove Grey to complete the section. I also made new endpapers from Dove Grey. Next, I cleaned the spine, repositioned the sections, tipped on the last two pages with paste, and lined the spine with Japanese Tissue. Then I put the first section and end papers in place and put the book in the press. Then I lined the spine again with linen. Once that lining was dry, I sewed on the endpapers, the first section, and repaired the sewing for the sections in the middle which needed it. Then I slightly rounded the spine and lined it with a heavy weight paper to help hold the shape.
Then I made a new spine piece from linen lined Morike, complete with 10 pt board stiffener. I lifted the cloth on the covers, positioned them on the book and carefully moved it to the press. Next I attached the new spine piece to the covers, glued down the turn ins, and then cased in the text block via the linen and new endpapers.
Finally, I did some Japanese tissue repairs on the cover and toned the new spine piece to match with acrylics. (The middle image shows pages from the first section and the bottom is the last page of the index).