Showing posts with label morike. Show all posts

Saturday, September 11, 2010

Paper Reback

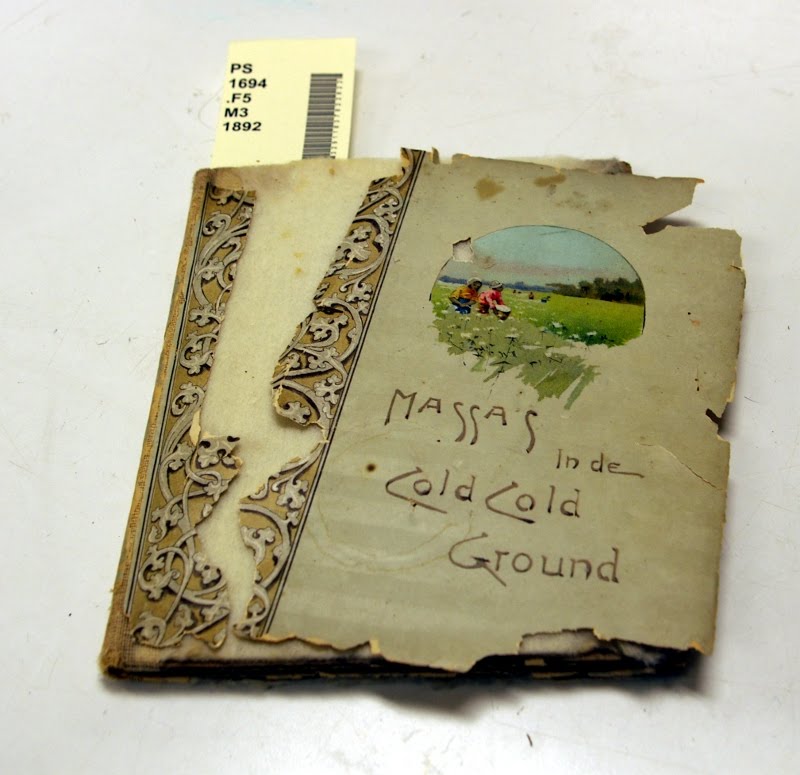
This book was originally bound in marbled paper. The spine had delaminated and pieces were missing. The corners were also badly bumped.
Rather than reconstructing the spine and attempting to tone to match, I decided to attach a new spine piece made from linen lined Morike.  First I removed the remaining spine piece, and cleaned and lined the spine. Then I attempted to re-round it gently with a hammer. I lifted the paper on the boards, and trimmed it back slightly. I also lifted the end papers to make room for the turn ins. I attached the new spine piece, turned it in and pressed the book with jointed boards. This was the end result.

Thursday, June 24, 2010

Spine Repair

This particular book's spine had broken at the joint. The bottom half was also missing. Since the inner hinge and muslin lining were intact, a complete reback would have been overkill.
 To infill the missing piece of the spine, I cut a piece of 10 point board the width of the spine and the height needed. I used a Morike similar in color to the cover material to attach the 10 point board and to repair the joints and end caps. This is the completed repair.

Thursday, June 10, 2010

Recent Rebacks

These are two cloth rebacks I completed simultaneously. Thankfully for both books the sewing was in tact. This first book's covers were detached, the end papers were delaminating, the spine round was askew, and the first three pages were loose.
I started by tipping in the loose pages with wheat starch paste. Then I pasted out and lined the spine, with Japanese tissue and linen. When both linings were dry, I gently hammered the spine to fix the round. Then I proceeded with a reback repair as usual. This is the end result.
This is the second book.

Tuesday, May 25, 2010

Leather Reback

On a recent field trip to the book conservation lab at Cornell University, I saw a few leather bound books that were rebacked with new leather (calf). This was interesting for me because most of the leather rebacks were do at Syracuse are repaired with PC4 paper. I decided to go through the stacks and find a good candidate for this treatment. This was the book I found.
My first step was to dye some of the calf leather we had to match. I used J.Hewitt aniline dyes, which start as a powder. You mix the powder with wheat starch paste (powder) and a little water to make a paste, then dilute as needed with boiling water. Dampen the leather with a sponge, then apply the dye. This picture shows the leather before (left) and after (right) dying.
While the leather was drying, I removed the old spine piece (saving the label), and cleaned the spine with methyl cellulose. I had to watch it carefully to the original end bands did not come off with the gunk. I pasted out the spine and lined it with Japanese tissue, which came up on to the end bands for additional support. Then I cut strips of linen, to fit between the cords, and glued them down with PVA. While the spine dried, I lifted the leather and end papers at the spine and corners of the boards. I reattached the boards by gluing the linen spine lining down under the lifted leather.
I pared and pasted out the new leather (one thick coat, let sit for 10 min folded over itself, add another coat) and molded it over the corners and spine. I also made sure to leave enough leather at the head and tail (after turn ins) to construct head and tail caps. I left this to dry over night. 
The next day, I glued down the lifted materials with PVA. I glued out a strip of Mylar, and slid it under the lifted leather, tapped down on it gently, and slid the strip out. This ensures just enough glue gets underneath, and has less risk of the leather darkening. I also pasted out strips of Japanese tissue for the inner hinge. 
While this dried, I worked on the spine label. I found a Morike similar in color to the label, and glued two pieces together. Then I glued the original label to the Morike and toned it to a better match with acrylics. I measured the spine width, and the height between cords, and cut the Morike to size. Then glued it in place with PVA. These are pictures of the end result.
I am going to try the technique on other books in the lab. The biggest problem I faced was building up my corners, which is something I need to work on. Other than that, my color is a little light, so the next time I will add a few additional coats of dye and dab them on with a sponge, to give the leather an aged look. Aside form dying the leather, this process didn't take much longer than a PC4 reback, and I like the end result better. Obviously the materials for this type of repair are more expensive, but I think it is worth it for the right books.

Tuesday, May 11, 2010

Padded Boards

This was actually the first book I'd encountered in the lab with padded boards. The cover material felt like paper lined vinyl. The material was cracked in a few places and was coming off the padding. The spine had almost entirely deteriorated. Luckily, the sewing, original mull lining, and joints were in tact.
I removed the covering material gently with a spatula. Next, I lifted the endpapers at the turn ins. This was relatively easy because I went under the original cover material turn ins. Then I took off the few remaining bits on the spine. I pasted out the spine and lined it with Japanese tissue, then linen (PVA). The padding was only attached by four tiny dabs of glue, so I was able to fold it back on itself and bring all the new materials on to the boards. I also added a new spine piece of linen lined Morike and a stiffener, to make the spine more durable.
To recover the book, I used a sheet of Morike. I glued it down only at the spine and the turn ins, to prevent damage to the padding. Finally, I glued the original covers on the Morike (PVA). I did not bother to tone the Morike because I was afraid it would do more harm than good.

Wednesday, May 5, 2010

Leather Reback with Previous Repair

I picked this book off the cart because it had a lot of previous repairs. The sewing had broken and the text block was in two pieces. The sections closest to the break were being held in place with pressure sensitive tape. Being a tight backed book, the spine had also broken. The book was being held together by what looked like maroon duct tape. This tape was also on a few pages in the first section. There was also approximately ten pages of images, which had be cut down and taped together, in a random order, with pressure sensitive tape behind the title page.
I began be removing the tape from the spine. The adhesive was delaminating, so it peeled off easily, but did leave some residue on the leather. Next I removed the pressure sensitive tape from the pages of the text block with a tacking iron. I repositioned the now loose folios, cleaned the spine, and lined it with Japanese tissue and linen. Then I repaired the sewing at the break.
I worked on the images while my spine liners were drying. I removed the tape from all the images and lined the sheets with heat set tissue. The images were on single sheets, which I collated and guarded together. Then I tipped them on to the front of the text block with a thin strip of Japanese tissue.
Then I lifted the leather on the cover and attached the text block via the linen. I constructed a new spine piece from linen lined Morike and added a 10 pt board stiffener. I attached this under the leather, the glued the leather back down. Finally, I put some PVA and Japanese tissue on the corners to reshape them, and covered the linen hinge with a strip of Japanese tissue (paste).

This book was an experiment in toning techniques for leather. I toned the new spine piece prior to attaching, and I tried to stipple a variety of hues to better match the leather. My colors were a little light for this book, but overall I was pleased with how it looked. I plan on trying this technique again on other books.

Thursday, April 29, 2010

Recent Projects

These are two books I have treated recently in the lab. Unfortunately, I got ahead of myself with these books and did not take before images.
This book was a half leather reback. The text block was a group of pamphlets sewn together and one section was exceptionally brittle. Initially, I tried to tip in the loose pages of this section with paste, but it was unsuccessful. It had to be removed from the group, washed and deacidified,  then guarded and resewn into the text block.
After the text block was repaired, I repaired the case and reattached it as seen in my previous entries. This is the completed book.
This book originally had fake raised bands, so I decided to mimic that when I rebacked it. Before cleaning and lining the spine, I made a template of the band positions. To make the fake raised bands, I glued two pieces of leather together and cut them into strips of the appropriate size. Then, using the template, I positioned the strips on the new spine stiffener. This was good practice, but because the leather was rotting 19th century leather, nothing was gained by saving the spine pieces. This process should be reserved for either better quality leather or a more valuable book. This was the end result.

Friday, April 23, 2010

Cook Book

A good friend of mine inherited this cook book from her aunt, in this condition. It is a little dated with some of the recipes, but she claims it also contains priceless ones. Looking for a new project to tackle, I offered to repair it for her. The covers were totally detached, the endpapers were falling off the boards, and the first section and the last two pages were in pieces. (The middle image shows the first section's pages and the bottom is the last page of the index. This is also the page missing the most information).
I began by flattening and repairing the damaged pages. I lined them with heat set tissue, and added additional tissue to the fraying edges. The first pages of the first sections were missing, so when the pages I had were repaired, I guarded them to pages of Dove Grey to complete the section. I also made new endpapers from Dove Grey. Next, I cleaned the spine, repositioned the sections, tipped on the last two pages with paste, and lined the spine with Japanese Tissue. Then I put the first section and end papers in place and put the book in the press. Then I lined the spine again with linen. Once that lining was dry, I sewed on the endpapers, the first section, and repaired the sewing for the sections in the middle which needed it. Then I slightly rounded the spine and lined it with a heavy weight paper to help hold the shape.
Then I made a new spine piece from linen lined Morike, complete with 10 pt board stiffener. I lifted the cloth on the covers, positioned them on the book and carefully moved it to the press. Next I attached the new spine piece to the covers, glued down the turn ins, and then cased in the text block via the linen and new endpapers.
Finally, I did some Japanese tissue repairs on the cover and toned the new spine piece to match with acrylics. (The middle image shows pages from the first section and the bottom is the last page of the index).

Wednesday, April 14, 2010

Half Leather Reback - Private Job

This is a repair I worked on during my weekly class. These are the before treatment images.

It follows the same basic guidelines as my previous entry, with a few additional steps. Because the leather extended further on to the boards, I had to infill the board with a thick paper (I used water color paper), to make the transition smoother. The paper used to infill was left one millimeter away from the lifted cover material. This gap allows the new spine material to fit flush underneath the cover materials.
I also did some gold tooling along the spine (using a template I made of the original lines) and reattached the original label, lined with Morike so it reached the shoulders. These are images of the finished book.

Friday, April 9, 2010

Rebacking Half Bound Books

I have worked on several reback repairs, but not any on half bound books until recently. What I mean by half bound is that the spine material differed from the covers. For this particular book, the spine was book cloth and the boards were covered in paper. The text block had fallen out of the case and the spine was only attached to one cover.
I cleaned and lined the text block, then worked on the boards. The difference between this book and other reback repairs is that the excess book cloth on the covers is removed, flush with the paper. This creates a smoother transition between the new spine and cover materials.
Once the book cloth was removed I lifted the paper slightly, so the Morike will fit underneath it. Then I proceeded to attach the text block and repair the case as usual. This is the completed repair.
I worked on a similar repair in my class, which I will post when I have the pictures.

Thursday, April 1, 2010

Previous Repair

I came across these two book on the end processing cart, which had previously been repaired in some way. Strike had a oxford hollow added to the spine which was keeping the spine piece attached.
With the Pictorial Family Encyclopedia, the spine was glued directly to the original lining to keep in in place. Also, the joints had been covered with strips of book cloth at some point which were delaminting.
My first step on both was to remove the spine piece. For Strike, I took a scalpel and cut the hollow at the joint, being careful not to damage the spine piece. For the encyclopedia, I was lucky because the original lining the spine piece was glued directly to was delaminating. I was able to totally remove the spine with a spatula. Next, I removed as much as I could of the old linings on both spine pieces with a spatula, and set the pieces aside.
From this point on, the encyclopedia became a standard rebacking job. The covers were already falling off, so I removed them, cleaning and lined the spine, repaired some sewing and then constructed a spine piece from linen lined Morike.
Strike was finished a little differently. This book had decorative endpapers that I did not want to disturb, and the covers were firmly attached. I still cleaned and lined the spine for support, and made a new Morike spine piece, but instead of breaking the joint, I lifted the cloth and brought the new material on to the boards.
Finally, I reattached the spine pieces and did some basic Japanese tissue repair to the covers on both. These are the finished books.