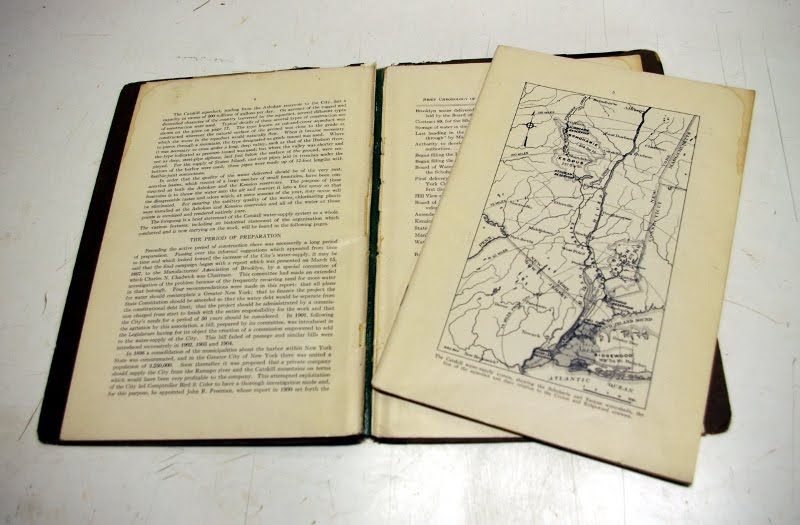
This was a leather bound book that I did Japanese tissue repair for. A couple of the corners were seriously damaged and misshaped.
To infill the corners, I cut small squares of board. These should be small enough to handle, but extend past the book's board edge so they can be trimmed to size later. I parred these squares of board at one corner, until they were thin enough to fit between the existing board. It is important not to par too far out. Remember the thickness of the square should be flush with the book's covers at the board edge. I attached these squares with PVA. Then I covered the new material with Japanese tissue, overlapping on to the original leather.
When all the corners were repaired, I toned them to match, and applied SC 6000 wax. This is the end result.
A blog about bookbinding, book conservation, artist's books, printmaking and interning.
Monday, July 5, 2010
Tissue Repair on Leather
This particular book's joint was broken and the spine was loose. It also had damage to both end caps. I repaired these areas with Japanese tissue. Unfortunately, I was working on a group of seven tissue repairs and did not take "before" pictures. Because the leather was also deteriorating, I coated the entire book with Klucel G. This picture shows the book before toning.
I was very lucky because the color of this leather was easy to match. For this reason, I decided to tone the areas of deteriorated leather between the gold stamping. After doing this, I applied SC 6000 wax to the areas treated with tissue, to add shine and create the appearance of leather. This is the end result.
Labels:
acrylic,
bone folder,
book conservation,
book repair,
codex,
conservation,
japanese tissue,
klucel g,
leather,
sc6000
Monday, June 28, 2010
Pamphlet Repair
This pamphlet was originally housed in a pamphlet binder. The binder was old and acidic.

The pamphlet had been attached to the binder with a book cloth hinge. The first and last pages were still attached with this hinge, but the rest of the text block had broken away.
The first step was to remove all the pages from the binder. I cut the attached free using a scalpel. Next, I removed the book cloth. I was able to peel it off dry because the adhesive had deteriorated. Then I guarded the loose pages together using heat set tissue, and resewed the pamphlet. Finally, I rehoused the object in an archival envelope.
Thursday, June 24, 2010
Spine Repair
This particular book's spine had broken at the joint. The bottom half was also missing. Since the inner hinge and muslin lining were intact, a complete reback would have been overkill.
To infill the missing piece of the spine, I cut a piece of 10 point board the width of the spine and the height needed. I used a Morike similar in color to the cover material to attach the 10 point board and to repair the joints and end caps. This is the completed repair.
Labels:
10 pt board,
adhesive,
book conservation,
book repair,
japanese tissue,
morike
Wednesday, June 23, 2010
German Springback
I have made one German style Springback before, and decided to make another, smaller one. Following these instructions, I made this.
Note: Because my Springback was bound in leather, not only did I have to pare the edges, but I also had to pare the joint so the material would fit into the groove. I was able to do this by first drawing a line where the grooves would be. Then, placing a brush handle under the line and running my paring knife along it. This removed a small amount of the leather, and gave me a guide to work from. I pared the rest thin using a scalpel.
Labels:
adhesive,
bone folder,
book binding,
book conservation,
codex,
conservation,
end bands,
goat leather,
leather,
minature,
paring
Wednesday, June 16, 2010
Mylar Envelope
Besides the codex, we also encounter pamphlets, limp paper bindings, newspapers, etc. Sometimes these materials have some damage, but do not warrant intensive repair. In those cases, we can often provide support by encapsulation in a Mylar envelope. This envelope enables you to view the materials, remove them for handling, and keeps them protected and flat (with a 20 or 40 point board for support).
This particular book was stapled at the spine. The staples had rusted away, but the pages were still collated and in tact. The book had also been stored folded.
I cut a piece of board to the exact size of the book, and constructed the Mylar envelope. I began by folding a piece of Mylar in half and sharpening the fold with a bone folder. I put this fold into the mounting press. Then I used the crisp edge to cut the next side. I put the book and board between the Mylar sheets to measure the final side (the thickness of the materials must be accounted for). After removing the object, I cut and pressed the third side. The forth side was also trimmed, but left open so the object can be removed. This is the end result.
Mold Removal
This book came through the lab on our end processing cart. There was mold on the front cover and on the first 30 or so pages. This is a picture from one of the worst pages.
To remove the mold, I used a Nilfisk vacuum. These vacuums are great for mold because their chamber is completely contained, so there is no risk of it escaping. They also enable you to control suction strength and speed, for more delicate materials. All I had to do was run the brush attachment over the cover and each page, and it removed the mold spores. This is the same page after cleaning.
Note: Because mold spores can be inhaled and cause illness, it is advised for this method of treatment that a facial mask is worn and if possible, the materials are cleaned under a fume hood.
Labels:
book conservation,
book repair,
codex,
conservation,
mold,
mold removal,
nilfisk
Subscribe to:
Posts (Atom)