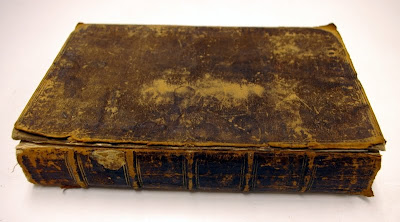
This particular book was leather bound and missing its back board.
Normally, my first response would be to rebind the book. If the book had any important book plates, I would soak that board in a warm water bath, until the book plates floated off. Then I would reattach them to the new board when dry. However, this book had a nice book plate that was painted with fugitive inks. A water bath would have destroyed it. I had to find another way to replace the board.
Since the front board was not attached, I used it as a guide to cut a new piece of board (make sure to account for the added thickness of materials at the squares). I sanded and back cornered the new board so it would tight against the shoulder. Then I cut new endpapers for the back cover, and attached them to the text block with paste.
I toned a piece of PC4 paper using and acrylics/methyl cellulose mix, to match the original leather. While that dried, I built up the corners on the remaining board.
I took the new board and covered it with the PC4 paper and put it in the press, between blotters, to dry flat. Since this paper is relatively thick, I also infilled the board with a 10 pt card (after pressing).
Because the original spine was a tight back and was still intact, I couldn't bring the new material around the spine. Therefore, I attached the new board as I would the originals, with Japanese tissue at the hinge and joint.
I attached the boards at the inner hinge first, using a strip of Japanese tissue and wheat starch paste. (This has to be done one at a time. Make sure the paste has ample time to dry). I reinforced this by adding additional tissue to the joint with PVA. I also reconstructed the head caps. I glued out a piece of tissue, overlapping on to both boards, and wrapped it around a piece of cord, the width of the spine and the height of the squares.
Finally, I toned all the tissue to match. This is the end result. (Middle: original leather board, Bottom: new PC4 board).


No comments:
Post a Comment